| Min. Order: | 100 Set/Sets |
|---|---|
| Trade Term: | FOB |
| Payment Terms: | L/C, WU, T/T, Paypal |
| Place of Origin: | Zhejiang China(Mainland) |
| Means of Transport: | Ocean,Land,Air |
| Production Capacity: | 5000 Sets Per Month |
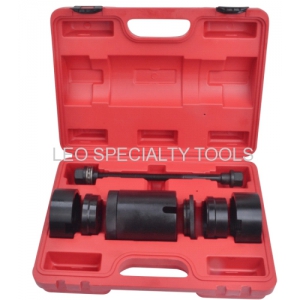
| Packing: | Blow Box |
| Delivery Date: | 30 Days | Model No:: | LT6254 |
|---|---|---|---|
| Color: | Red/Blue/Black | Port: | Ningbo/Shanghai |
| Pricing Term: | FOB | Delivery Time: | 30 Days |
| Payment Term: | L/C,T/T,Paypal | Transport: | Sea,Air,Land |
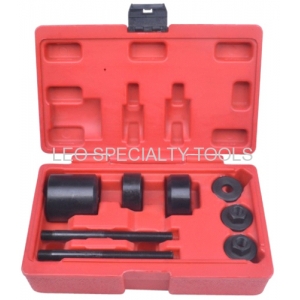
Front Control Arm Bush Removal/Installation
Tool-BMW Mini

Description:
Suitable for the removal/installation of the front control arm suspension bush on BMW Mini.
Applications:
One, Cooper, Cooper S (2001 on) R50/R53 Chassis W10/W11/W17.

Operation:
1. Removing bush.
1.1. Assemble the removal (black) set as in fig.1. Thread the adaptor
(C) onto the short threaded end of the force screw (F) with the
ridged side of adaptor (C) facing inwards. Pass the force screw
(F) through the bush from the rear and position adaptor (C) so
that the ridge sits in the recessed area of the bush (fig.2).
Position adaptor (B) over the force screw (F), then fit adaptor (A)
so that the seal sits inside adaptor (B). Fit the bearing (H) and
then thread the nut (G) onto the force screw (F) and wind it up to
the adaptor (A).

1.2. Using a 24mm deep socket or spanner, turn the nut (G)
clockwise. The extractor will start to extract the bush through
the front control arm housing.
1.3. Keep turning until the bush has been extracted all the way out
of the front control arm.
2. Installing new bush.
2.1. Before installing a new bush, clean the inside of the front control arm housing. Prior to installing the new bush, ensure that the small arrow embossed on the bush aligns with the front control arm in the position shown in fig.3. This will ensure correct alignment of the wish-bone on refitting.

2.2. Adaptor (D) is threaded onto the short threaded end of the force screw (F) with the ridged side facing inwards. Pass the force screw (F) through the bush, through the front control arm housing and position the Adaptor (E) over the force screw (F), fitting it against the front control arm housing. Fit the bearing (H) over the force screw (F), thread on the nut (G) and wind it up to the adaptor (E).

2.3. Using a 24mm deep socket or spanner, turn the nut (G) clockwise. The bush will start to be pulled into the housing.
2.4. Continue to turn the nut (G) to install the bush, when the bush reaches the adaptor (E), the bush is fully installed (Fig.5).

Packing details:
QTY(SET) | G.W.(KGS) | N.W.(KGS) | MEAS(CM) |
5 | 18 | 17 | 46*27*17 |